My kids, all three of them, love fruit snacks! As long as I find the ones with less sugar and made with juice, I don't mind them having them. The problem is that they can get pricey! I tried making homemade fruit snacks. They turned out, but were not winners. My kids didn't really like them too much and with the amount of gelatin I had to buy to make a decent amount of them, I don't think it saved any money at all.
So, plan B was to try Homemade Fruit Roll-Ups or (fruit leather.) And they were so simple, so easy to make and everyone LOVES them! I made strawberry the first couple times and just over the weekend I made mango and they seem to be just as good. They are 2 ingredients and turn out great!
Fruit Roll-Ups
from Baked by Rachel
Ingredients:
 |
| Ready to puree |
1/2 honey
Directions:
- Preheat your oven to 170 or as low as it will go
- Line 2 sheet pans with silicone baking mats, parchment paper or plastic wrap (the last time I made them I used plastic wrap and I like it better then the parchment.)
- Blend until smooth.
- If it is a seeded fruit, like strawberries, feel free to strain the seeds if you don't think you're kids will like them. I did.
- Pour puree onto each lined baking sheet and using an off-set spatula spread it out into a thin layer.
- Bake for about 3 hours, rotating pans 1/2 way through. They are done when the middle is no longer soft or too sticky.
- Allow to cool then remove from sheet and place onto wax paper.
- Using a sharp knife or pizza cutter, cut into strips or squares.
- Roll up with the wax paper and store in refrigerator or air tight container.


 |
| Cutting into strips |
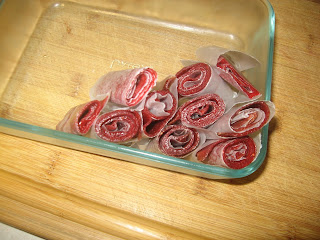 |
| These won't last long! |
No comments:
Post a Comment